Customer Outreach
This section documents the outreach emails sent to Ready-to-Launch customers.
These emails are designed to guide users through key activation moments and ensure they get the most value from their banking experience.
Each email is carefully timed and conditional, ensuring customers receive relevant information at the right moment in their journey.
Application Approved Email
Purpose
Welcome customers to their new banking account and encourage them to start exploring their banking features.
This email confirms successful account approval and provides a clear call-to-action to access their account for the first time.
Prerequisites
Before this email can be sent, the following condition must be met at the organization level:
- The organization must have a Banking Page URL set via Unit. This is the place where end-customers will land when they click links from the email.
Email Preview
Application Denied Email
Purpose
Inform customers that their banking application was not approved and provide support contact information.
Email Preview
Missing Documents Reminder Email
Purpose
Prompt customers to upload required documents to complete their banking application.
Prerequisites
Before this email can be sent, the following condition must be met:
- The organization must have a Banking Page URL set via Unit. This is the place where end-customers will land when they click links from the email.
Timing
The email is sent at the following intervals: 10 minutes, 1 day, 3 days, 7 days, and 14 days after the trigger event, until the documents are uploaded.
Email Preview

Initial Funding Reminder Email
Purpose
Remind newly approved Ready-to-Launch users to fund their account so they can begin using their banking services.
Funding the account is a critical activation moment - it enables transactions, card use, and starts the user's journey with the product. Without funding, customers cannot fully utilize the banking features they've been approved for.
Prerequisites
Before this email can be sent, the following condition must be met at the organization level:
- The organization must have a Banking Page URL set via Unit. This is the place where end-customers will land when they click links from the email.
Email Context
This email serves as a follow-up to the approval notification, targeting customers who have completed onboarding but have not yet funded their account.
The email features a prominent call-to-action button that directs customers to their banking page where they can fund their account via bank transfer, check deposit, or cash.
The message concludes with a welcoming statement and a summary of key account features to encourage activation.
Sending Conditions
The email will only be sent when all of the following conditions are met:
- The customer must have their first name set
- The customer must have their email address set
- None of the customer's accounts have been funded
Timing
The email is sent 24-48 hours after successfully creating a customer in your banking platform, provided that none of the customer’s accounts have been funded.
Email Preview
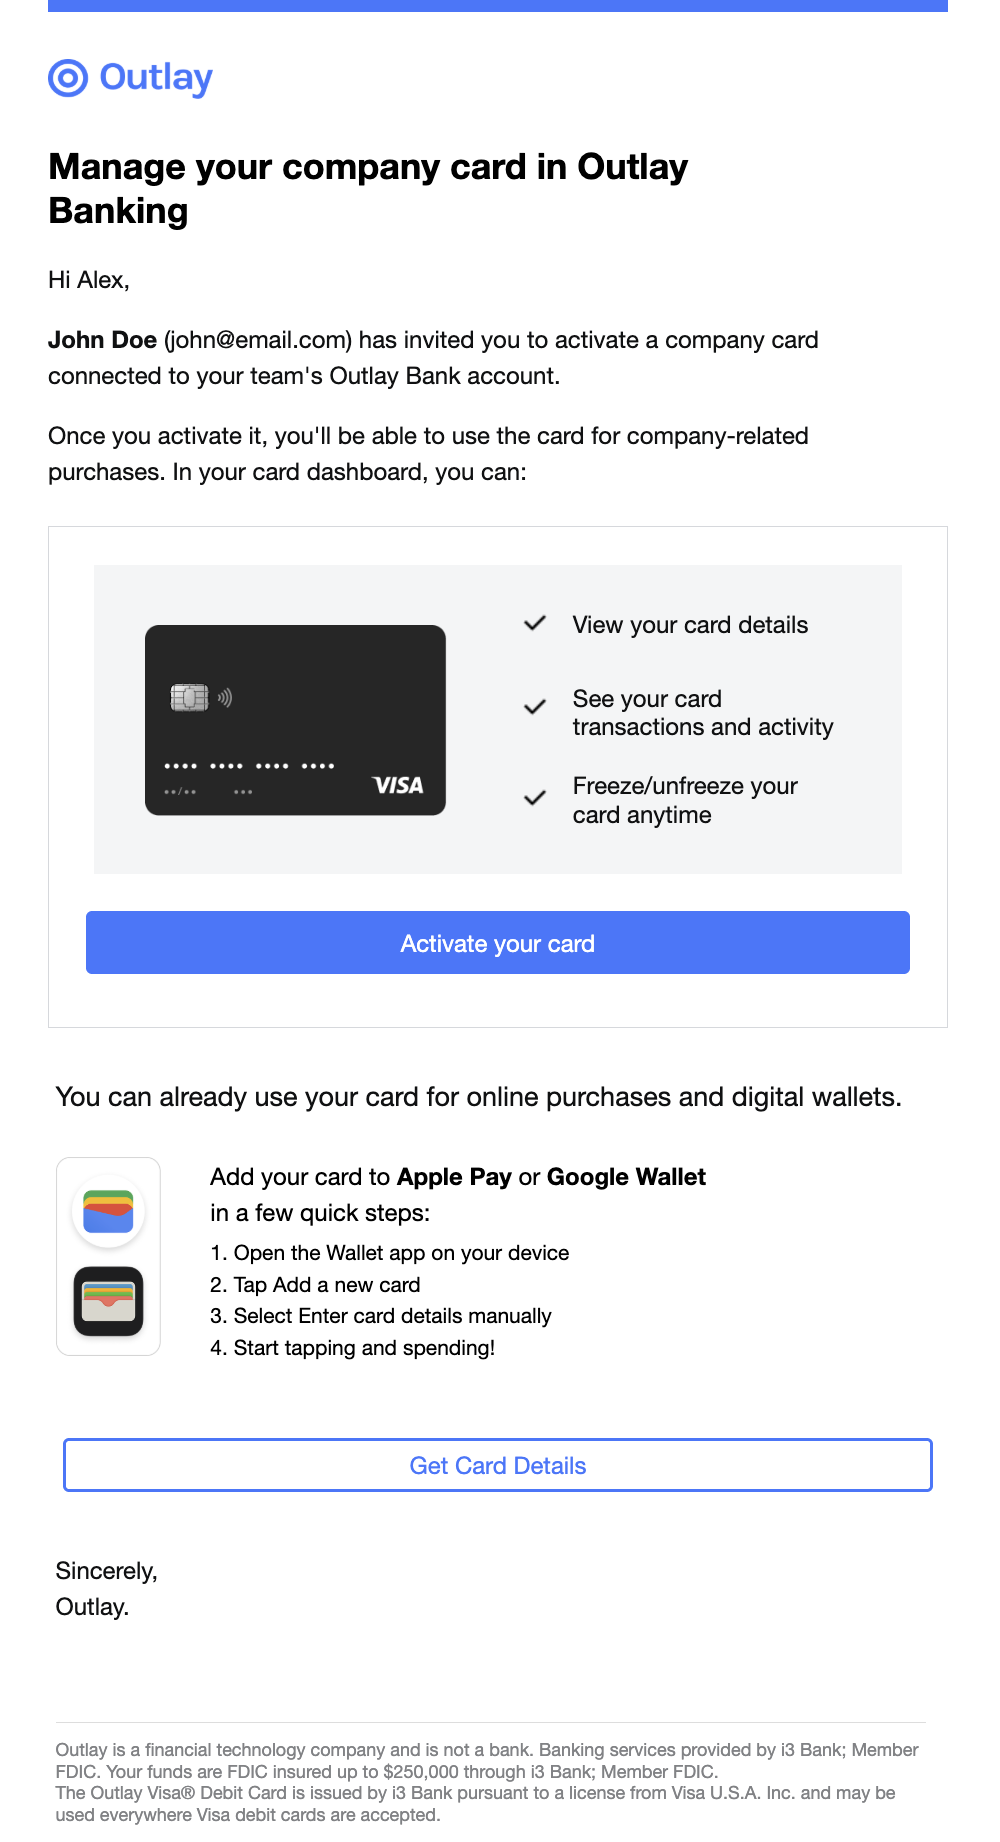
Cardholder Invite Email
Purpose
Notify a user that they have been invited to use a business debit card created for them by a customer. The recipient can open the link to activate the card, then view card details, see transactions, and freeze or unfreeze the card.
Prerequisites
Before this email can be sent, the following condition must be met at the organization level:
- The organization must have a Banking Page URL set via Unit. This is where the invited cardholder lands when they click links in the email.
Timing
The email is sent when a customer invites a Cardholder to access a single, specific business debit card created for them.
Email Preview
Marketing landing page
You can create a marketing external landing page for your banking product. This page will show information about the product and the benefits of using it for your customers.
To create a marketing external landing page, you can use unit elements marketing external landing page component.
<unit-elements-banking-external-landing
  company-name="MainStreet"
  get-started-link="https://www.unit.co/docs/white-label-uis/"
  card-holder-name="Peter Parker"
  fluid="true"
></unit-elements-banking-external-landing>
where:
company-nameis the name of your company.get-started-linkis the link to the get started page.card-holder-nameis the name of the card holder.fluidis a boolean value that indicates if the component should be fluid for spacing and title sizes.
The component will display the marketing landing page content.
You can use the default theme for the component or you can customize the component by creating a theme for the component. For landing pages we have the following properties in theme object:
{
  "elementsLandingPages": {
    "backgroundColor": "#000000",
    "paddings": {
      "block": {
        "min": "10",
        "max": "20"
      }
    },
    "hero": {
      "backgroundColor": "#000000"
    }
    // ...other properties
  }
}
where:
backgroundColoris the background color of the landing page.paddingsis the padding of the landing page in pixels,minandmaxare the minimum and maximum padding in pixels for fluidity. Orminfor small screens andmaxfor large screens when fluid is false.herois the theme for the hero section.
The whole theme object structure you can find in the Marketing landing page storybook -> Unit Theme -> elementsLandingPages property.
Also for titles we have the following properties in theme object:
{
  "global": {
    "typography": {
      "titles": {
        "landings": {
          "internal": {
            "h2": {
              "color": "#000000",
              "fontSize": {
                "min": "16",
                "max": "24"
              },
              "fontFamily": "sans-serif",
              "fontWeight": "800"
            },
            "h3": {
              "color": "#000000"
              // ...other properties
            }
          },
          "external": {
            "h2": {
              "color": "#000000"
              // ...other properties
            },
            "h3": {
              "color": "#000000"
              // ...other properties
            }
          }
        }
      }
    }
  }
}
where:
externalis the theme for the external landing page.internalis the theme for the internal landing page.coloris the color of the title.fontSizeis the font size of the title in pixels,minandmaxare the minimum and maximum font size in pixels for fluidity. Orminfor small screens andmaxfor large screens when fluid is false.fontFamilyis the font family of the title.fontWeightis the font weight of the title.
The whole theme object structure you can find in the Marketing landing page storybook -> Unit Theme -> global.typography.titles.landing property.
Also you can customize the card icon in theme object:
{
  "elementsCard": {
    "designs": [
      {
        "name": "default",
        "url": "https://d1xlopvhx2cz8k.cloudfront.net/resources/outlay.png"
      }
    ]
  }
}
To see how we can customize the whole page you can follow Ready-to-Launch Branding page with "Banking External Landing" option selected in UI selector.